
Pre-Operation Safety Protocols: The Zero Harm Approach
When we deal with Medium Voltage Switchgear, there is absolutely no room for error. The “Zero Harm” approach isn’t just a corporate slogan; it is the only way we ensure every technician goes home safe. Before we even look at a schematic or touch a handle, we establish a perimeter of safety that protects both the operator and the critical infrastructure. This guide serves as your baseline for the Medium Voltage Switchgear: Safe Operation & Fault Guide, prioritizing life safety above all else.
Mandatory PPE Standards and NFPA 70E Compliance
Never approach a live panel without the right armor. We strictly adhere to NFPA 70E standards to mitigate arc flash risks. It is not enough to just wear a hard hat; you need specific Arc Rated (AR) clothing matched to the calculated incident energy analysis of your specific medium voltage switchgear.
Arc Flash Suit: Verify the calorie rating (cal/cm²) exceeds the potential blast energy listed on the equipment label.
Insulated Gloves: Use Class 2 or higher rubber gloves for MV work, and always perform an air-leak test before use.
Face Shields & Balaclavas: These are essential for protecting against molten copper spray and intense UV radiation during a fault.
Hearing Protection: Switching operations can be loud; protect your hearing from the mechanical snap of the breaker.
The Five Preventions Interlock System Explained
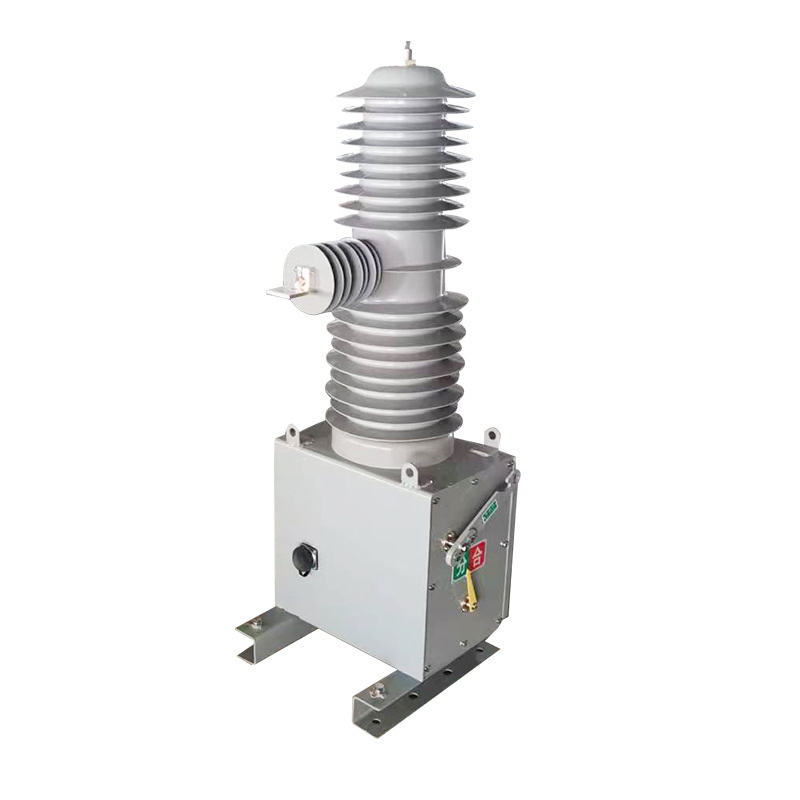
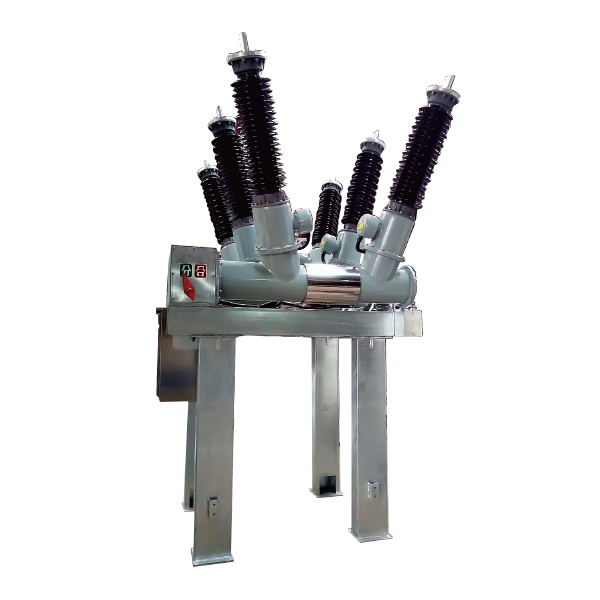
Mechanical errors cause explosions. That is why the Five Preventions Interlock System is the backbone of modern switchgear safety, particularly in robust metal-clad units like the KYN28-12 switchgear. At WEISHO, we treat these interlocks as the final line of defense against human error, ensuring that the equipment physically refuses to perform an unsafe action.
The 5 Mandatory Interlocks:
1. Prevention of Load-Breaking: You cannot pull the isolation switch or rack out the cart while the breaker is under load.
2. Prevention of False Closing: The circuit breaker will not close if the handcart is not fully in the “Test” or “Service” position.
3. Prevention of Live Earthing: You cannot close the earthing switch if the main circuit is live.
4. Prevention of Powering with Earthing On: The breaker cannot be closed if the earthing switch is currently engaged.
5. Prevention of Entry: You cannot open the cable compartment door while the system is energized.
LOTO (Lockout/Tagout) Rules for Energy Isolation
Trusting that a breaker is open is not enough; you must guarantee it stays open. Our LOTO procedures require physical locks on the racking mechanism and shutters to ensure total energy isolation.
Isolate: Rack the Vacuum Circuit Breaker out to the test/disconnect position.
Lock: Apply a personal padlock to the shutter mechanism and the breaker handle.
Tag: Clearly label who holds the key, the date, and the specific reason the equipment is down.
Verify: Always use a rated voltage detector to confirm the system is “Dead” before applying grounds.
Environmental Checks and SF6 Pressure Monitoring
Before the operation, I always scan the physical environment. High humidity, dust accumulation, or leaking gas can turn a safe insulator into a conductive path. Whether you are operating SF6 vs Vacuum switchgear, safety protocols, and environmental awareness are key.
SF6 Gauges: For GIS units, ensure the pressure gauge needle is firmly in the green zone. Low pressure compromises arc quenching capabilities.
Humidity Control: Verify that anti-condensation heaters are functioning. Moisture on busbars is a leading cause of flashovers.
Physical Obstructions: Clear the racking area of tools, ladders, or debris that could impede the movement of the breaker truck.
Standard Operating Procedures (SOP) for MV Switchgear

Establishing a rigid Standard Operating Procedure (SOP) is the backbone of facility safety. When we deal with medium voltage switchgear, there is no room for improvisation. Every movement needs to be calculated, and every check must be documented. We approach these systems with a clear mindset: verify first, operate second. Below are the core operational protocols we follow to ensure personnel safety and equipment longevity.
Visual Inspection Checklist for Insulators and Busbars
Before any mechanical operation or testing, a thorough visual inspection is mandatory. This isn’t just a glance; it is a systematic review to catch electrical busbar fault-finding issues before they cause a flashover. We look for specific signs of degradation that often go unnoticed during quick walkthroughs.
Insulator Condition: Check all epoxy and ceramic insulators for surface tracking, cracks, or heavy dust accumulation. Dirt combined with humidity creates a conductive path.
Busbar Joints: Look for discoloration at the joints. If the copper or aluminum looks darkened or “burnt,” it indicates overheating due to loose connections.
Foreign Objects: Ensure the compartment is free of tools, rats, or debris left from previous maintenance.
Cable Terminations: Inspect for signs of stress on the cables or oil leaks if using liquid-filled termination kits.
Step-by-Step Guide: Racking In/Out the Vacuum Circuit Breaker
The racking process is one of the most critical tasks in medium voltage switchgear operations. This moves the breaker from the “Test/Disconnected” position to the “Service” position. Following the correct 11kV circuit breaker racking procedure prevents arc flash incidents and mechanical jamming.
1. Verify Status: Ensure the circuit breaker is in the OPEN position. Mechanical interlocks usually prevent racking if the breaker is closed, but never rely solely on the interlock.
2. Insert Handle: Open the racking shutter and insert the racking handle fully.
3. Racking In (Service): Rotate the handle clockwise. You will feel resistance as the primary contacts engage. Continue until the position indicator shows “Service” or “Connected.”
4. Racking Out (Test): Rotate counter-clockwise to withdraw. Stop when the indicator shows “Test.”
5. Alignment Check: If you are maintaining a high-performance indoor vacuum circuit breaker, verify the truck alignment before applying torque to avoid damaging the shutter mechanism.
Manual vs. Electrical Closing and Opening Operations
Modern medium voltage switchgear offers two ways to actuate the breaker: electrically (remote/local) and manually. Understanding the distinction is vital for troubleshooting and emergency response.
Electrical Operation: This is the standard method used during normal service via SCADA or the local control panel. It relies on the closing coil and tripping coil. If the breaker fails to operate here, we check the control voltage and relay logic.
Manual Operation: Used primarily during maintenance or power outages. You must manually charge the closing spring using the charging handle (if the motor hasn’t done it). Once the “Spring Charged” indicator is visible, you press the mechanical green “CLOSE” button.
Safety Note: Always stand to the side (not directly in front) when manually closing a breaker to minimize exposure in the unlikely event of a fault. Refer to your specific KYN28-12 switchgear manual for the exact spring charging cycles required for your model.
Common Faults and Troubleshooting Matrix

Even with top-tier engineering, field conditions can throw a wrench in your operations. When downtime hits, you need a systematic approach to identify the root cause quickly. We break down the most frequent issues we see in medium voltage switchgear and how to resolve them efficiently.
Diagnosing Electrical Failure to Close
When a Vacuum Circuit Breaker (VCB) refuses to close electrically, the issue often lies in the secondary control circuit rather than the primary power path.
Check Control Voltage: Ensure the voltage matches the closing coil rating. A blown fuse in the control circuit is a classic culprit.
Verify Interlocks: Our Five Preventions interlock system is designed to stop unsafe operations. If the handcart isn’t perfectly seated in the “Test” or “Service” position, the electrical closing circuit remains open.
Inspect Secondary Plugs: Loose auxiliary connections prevent the closing signal from reaching the mechanism.
Solving Mechanical Failure to Close Issues
If the electrical signal is good but the breaker still won’t budge, we look at the mechanical “muscle.”
Energy Storage: Verify the closing spring is fully charged. If the motor fails to charge the spring, check the limit switch or the motor itself.
Mechanism Jamming: Hardened grease or debris can seize the latching mechanism. A manual test (with power off) helps isolate mechanical stiffness.
Deformation: Inspect the operating rod and latch for physical damage or wear that prevents the mechanism from holding the “closed” position.
Fixing Nuisance Tripping and Relay Settings
Nuisance tripping disrupts production and confuses operators. This is rarely a hardware failure and usually a calibration issue.
Review Relay Settings: If the protection settings are too sensitive, normal inrush currents (like starting a large motor) can trigger a trip.
Anti-Pumping Logic: Ensure the anti-pumping relay is functioning correctly. If the closing command is maintained while a fault exists, the breaker should not repeatedly cycle open-close.
Ground Fault Sensitivity: Check if the Zero Sequence Current Transformer (ZSCT) is picking up noise or stray currents.
Addressing Overheating in Busbar Joints
Heat is the silent enemy of metal-clad switchgear components. Overheating almost always stems from high resistance at connection points.
Torque Check: Vibration over time loosens busbar bolts. A regular torque check during maintenance shutdowns is mandatory.
Surface Oxidation: Copper contacts can oxidize, increasing resistance. Clean surfaces and apply conductive grease.
Testing: Infrared thermography is great for spotting live hot spots. However, for a definitive diagnosis during shutdown, learning how to measure vacuum circuit breaker contact resistance allows you to quantify the health of your joints and contacts precisely.
Advanced Maintenance and Testing Techniques
To ensure the longevity of your medium voltage switchgear, relying solely on visual inspections isn’t enough. We need to use advanced diagnostic tools to see what’s happening inside the insulation and conductive paths. A robust switchgear preventive maintenance schedule moves beyond simple cleaning and tightening; it involves quantitative data that tells us exactly how the equipment is aging.
Insulation Resistance Testing (Megger) Guidelines
Insulation breakdown is a leading cause of catastrophic failure. We use an insulation resistance test, commonly known as “Meggering,” to verify the dielectric integrity of the busbars, circuit breakers, and instrument transformers.
Procedure: Isolate the switchgear and discharge any stored energy. Apply a DC voltage (typically 2.5kV or 5kV for MV systems) between phases and from phase to ground.
Duration: Hold the test voltage for a minimum of 60 seconds to allow the capacitive charging current to decay, giving you a true leakage reading.
Analysis: Readings should be in the Gigohm range. A sudden drop compared to previous logs indicates moisture ingress or insulation tracking.
For a deeper understanding of how insulation integrity impacts overall system safety, our switchgear and protection guide provides extensive details on coordination and fault prevention.
Contact Resistance Measurement and Micro-ohm Tests
Over time, bolted joints and breaker contacts can loosen or oxidize, creating high-resistance points that generate dangerous heat. A standard multimeter cannot detect these minute variances. We perform a switchgear contact resistance test using a micro-ohmmeter (Ductor).
Method: Inject a high DC (usually 100A) through the closed circuit breaker contacts or busbar joints.
Threshold: The resistance should be measured in micro-ohms.
Comparison: Compare the results against the factory acceptance test (FAT) values. Any reading significantly higher (e.g., >50% increase) suggests contact degradation requiring immediate attention.
Partial Discharge (PD) Monitoring for Early Detection
Switchgear partial discharge testing is the gold standard for predictive maintenance. PD occurs when there are small electrical sparks within the insulation that don’t immediately bridge the gap but slowly eat away at the dielectric material.
Online Monitoring: Using TEV (Transient Earth Voltage) and ultrasonic sensors, we can detect PD activity while the switchgear is live.
Interpretation: Consistent crackling sounds or high dB readings indicate internal voids or surface tracking. Catching this early prevents flashovers that destroy equipment.
Vacuum Bottle Integrity and Vidal Testing
For Vacuum Circuit Breaker troubleshooting, verifying the vacuum level in the interrupter is critical. If the vacuum leaks, the breaker loses its ability to extinguish arcs.
Vidal/Hipot Test: We perform a vacuum bottle integrity test by applying a high AC voltage across the open contacts of the VCB.
Pass/Fail: If the vacuum is intact, it will withstand the voltage without breaking down. If it flashes over, the bottle has lost its vacuum and must be replaced immediately.
Modern Design Features for Enhanced Safety

Arc-Resistant Structures and IEC 62271-200 Compliance
Safety isn’t an afterthought; it is the foundation of our engineering. We design our medium voltage switchgear to strictly adhere to the IEC 62271-200 standard. This compliance ensures that in the event of an internal arc fault, the equipment can withstand the massive pressure and heat without catastrophic failure.
Our primary defense strategy is robust medium voltage arc flash protection. We utilize dedicated pressure relief channels that redirect hot gases and plasma upward through the top of the enclosure, rather than blowing out the front doors where operators stand. This “chimney effect” is critical for personnel survival. Understanding the mechanics of why vacuum circuit breakers explode drives us to reinforce our metal-clad switchgear components with heavy-gauge steel barriers, creating distinct, isolated compartments for the busbar, cable, and breaker.
Smart Integration with SCADA and Digital Relays
The safest place to be during a switching operation is outside the arc flash boundary. Modern integration with SCADA systems allows for remote monitoring and control, effectively removing the human element from the danger zone. We move beyond simple mechanical interlocks to digital safety layers.
Key Digital Safety Integrations:
| Feature | Safety Benefit |
|---|---|
| Remote Racking | Allows operators to rack breakers in/out from a safe distance, eliminating exposure during the most critical moments. |
| Digital Relays | Provides millisecond fault-clearing speeds (typically 3-5 cycles) to drastically limit available arc energy. |
| Continuous Monitoring | Real-time tracking of switchgear partial discharge testing data and busbar temperature to predict failures before they occur. |
| Zone Selective Interlocking (ZSI) | Reduces thermal and mechanical stress on the equipment by communicating between relays to isolate faults at the nearest breaker only. |
Frequently Asked Questions (FAQs)
How often should Medium Voltage switchgear be serviced?
We recommend a tiered maintenance schedule to keep your system reliable. Perform a visual inspection for wire connections and moisture buildup monthly. Quarterly, you should conduct infrared thermography scans to catch overheating contacts before they fail. For deep maintenance—like functional testing of relays and mechanical interlocks—schedule this semi-annually. If your equipment operates in harsh environments, increase this frequency to prevent unexpected downtime.
What are the main causes of switchgear failure?
Failures typically stem from three main areas:
Thermal Issues: Loose bolts or oxidation causing contact overheating.
Insulation Breakdown: Often caused by high humidity, dust, or Partial Discharge (PD) eating away at the dielectric strength.
Mechanical Jams: Dried lubrication or fatigue in the spring energy storage mechanism.
External factors matter too; ensuring robust substation lightning protection and grounding is critical to prevent surge-related damage to your switchgear components.
What is the difference between AIS and GIS switchgear safety?
Air-Insulated Switchgear (AIS) uses air for isolation, meaning components are accessible but more vulnerable to environmental contaminants like dust and humidity. Gas-Insulated Switchgear (GIS) seals live parts in SF6 gas tanks. From a safety perspective, GIS offers better protection against accidental contact and arc flashes in confined spaces, but it requires strict monitoring of gas density to maintain insulation integrity.
How do I verify if a VCB is safe to rack out?
Safety here relies on the “Five Preventions” interlock system. First, visually confirm that the Vacuum Circuit Breaker (VCB) status indicator shows OPEN (usually green). Ensure the isolation shutter is closed and the grounding switch is engaged if required by your specific SOP. The racking mechanism should physically block you from inserting the handle if the breaker is closed. Always verify zero energy with a voltage detector before initiating the racking procedure.