
Testing a potential transformer involves gradually increasing the voltage. At each step, you should check the insulation resistance. Additionally, it's important to measure the winding resistance and the ratio between the windings. Ensure that your equipment is set up correctly. Conduct tests both under no load and under normal load conditions. Safety is paramount; always take precautions against electric shocks, fires, and moving parts.
Safety Incident | Prevention Tip |
|---|---|
Electric Shocks | Use insulated tools and protective gear |
Fire and Explosion | Monitor the temperature and maintain a safe area |
Mechanical Hazards | Secure loose parts and remain vigilant |
In the following sections, you will find clear steps and useful tips.
Key Takeaways
Always get your tools and equipment ready before you test a potential transformer. This keeps you safe and helps you get the correct results.
Look at the transformer first to find any problems. Fix any issues before you start testing so you do not cause damage.
Follow all safety rules, like wearing safety gear and using tools with insulation.
Do regular tests like the ratio test and winding resistance test. These tests check if the transformer works well and is healthy.
Check the insulation resistance to stop failures. High resistance means the insulation is good. Low resistance can mean there is damage.
Do load tests to see how the transformer works in real situations. This helps you find out if there are problems with safety or efficiency.
Write down all your test results and repairs in a logbook. This helps you keep track of the transformer's condition over time.
Always test with a partner. This makes testing safer and helps you get help fast if something goes wrong.
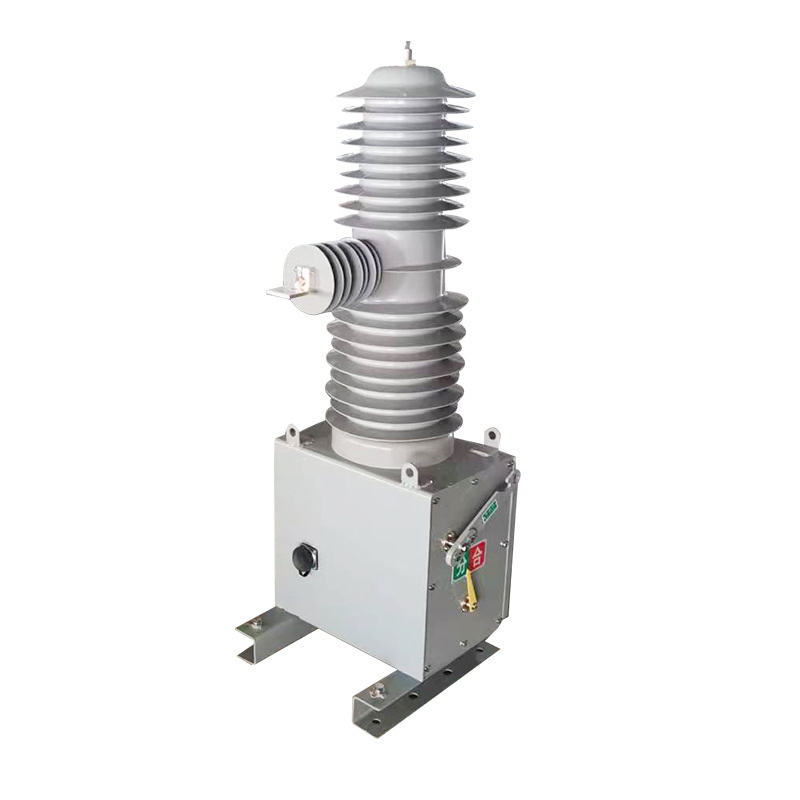
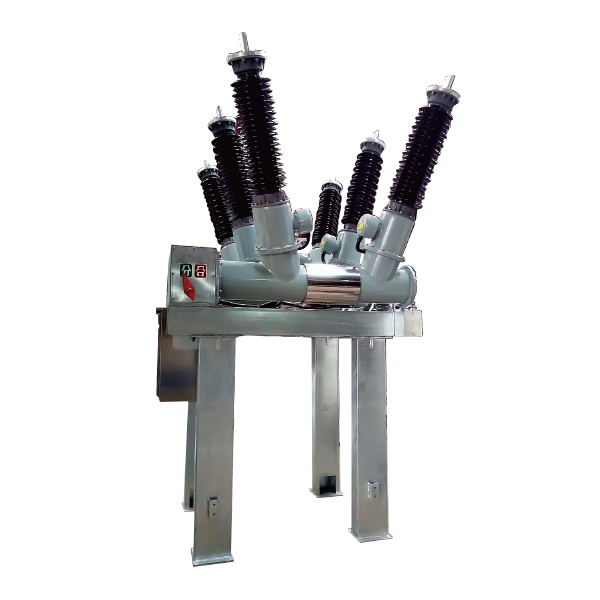
Test Preparation for Potential Transformer
Tools and Equipment
Get all the tools you need before you start testing a potential transformer. The right equipment helps you stay safe and get good results. Experts say you should use these tools for testing:
Frequency Response Analyzer
CT PT Analyzer
Transformer Testing Bench
Transformer BDV Tester
Surface Tension Tester
Transformer Oil Analysis Kit
Chromatographic Analyzer
Closed Flash Point Tester
Each tool does something special. For example, a Frequency Response Analyzer checks if the winding is in good shape. A Transformer BDV Tester checks how much voltage the oil can handle before it breaks down. Always make sure your tools work well before you start.
Initial Inspection
Always look over the potential transformer before you test it. This helps you spot problems early and keeps everyone safe. Follow these steps to check everything:
Read the nameplate and match it with the drawings and specs.
1. Look at the outside and make sure it is not damaged. Check that all grounding wires are tight.
2. Make sure the withdrawal and grounding parts move easily.
3. Check the size of the main and backup fuses.
4. Make sure the PT power jaws line up right.
5. Look at the star earthing on the PT primary winding.
6. Move the PT trolley and see if it rolls without trouble.
7. Tighten every connection.
If you find a problem, fix it before you keep going. Checking carefully can save time and stop damage.
Safety Precautions
Safety is the most important thing when testing. You must follow rules to keep yourself and others safe. Electrical safety codes say you need to take many steps. The table below lists the main safety steps:
Safety Precaution | Description |
|---|---|
Wear insulated gloves, safety goggles, and special clothes to lower the chance of getting hurt. | |
Equipment Inspection and Maintenance | Look at all your tools for damage before you use them. Keep them working well. |
Safety Protocols and Procedures | Follow each step for setting up and shutting down tests. Never skip a step. |
Emergency Preparedness | Know what to do if there is an emergency. Learn first aid and keep emergency numbers nearby. |
Tip: Always test a potential transformer with a partner. If something bad happens, someone can help you fast.
Industry rules like IEC 60076 and IEEE C57 say you must do routine, type, and special tests. These tests make sure the transformer is safe and works well.
Test Type | Description | Standard Reference |
|---|---|---|
Routine Tests | Basic tests are done on every transformer. | |
Type Tests | Tests on a sample to check the design. | IEC 60076-2 / IEEE C57.91 |
Special Tests | Extra tests for special project needs. | Project-Specific |
Getting ready the right way helps make your potential transformer test safe and dependable.
Ratio Test
Purpose
The ratio test checks if your potential transformer changes voltage the right way. It looks at how the voltage moves from the primary side to the secondary side. This test shows if the transformer gives the correct output voltage for the input. If the ratio is not right, the transformer might not work safely or correctly.
Procedure
Connecting Equipment
First, get your test equipment ready. Connect the test leads to both the primary and secondary windings. Use insulated tools for safety. Check all connections to make sure they are tight. Do not use loose wires or connect to the wrong terminals. Always look at the wiring diagram for your transformer.
Applying Test Voltage
Next, put a low-voltage AC supply on the primary winding. You do not need to use the full rated voltage. Using less voltage keeps the test safe and still works well. Watch the voltage level so it does not go too high. Never let it pass the safe limit for your test tools.
Measuring and Calculating Ratio
Now, measure the voltage on the secondary winding. Write down both the primary and secondary voltages. To find the turns ratio, use this formula:
Turns Ratio = (Primary Voltage) / (Secondary Voltage)
You can also check the measured ratio against the nameplate value. If you want to follow the steps, use this list:
1. Put a low-voltage AC supply on the primary winding.
2. Measure the voltage in the secondary winding.
3. Find the turns ratio by dividing the primary voltage by the secondary voltage.
4. Compare your answer with the limits to see if the transformer works correctly.
Tip: Always do the test at least two times. This helps you find mistakes and makes your results better.
Result Interpretation
After the test, look at your results. Compare your measured ratio with the value on the transformer’s nameplate. The difference between these numbers is called the ratio error. Standards like ANSI and IEC give limits for this error. You can check the table below for accuracy classes:
Standard | Accuracy Class |
|---|---|
ANSI | 0.3, 0.6, 1.2 |
IEC | 0.1, 0.2, 0.5, 1 |
A transformer with a ratio error of ±0.3% is in the 0.3 accuracy class. If your error is higher than allowed, the transformer may not be safe to use.
Many things can change your test results. Here are some important things to watch for:
High temperatures can make resistance go up in the windings and core, which can cause errors.
Very wet air can hurt the transformer and change how it works.
The excitation voltage and core permeability can change with the weather.
The type of transformer, how you connect your test tool, and the size of the voltage all matter.
Note: Always test in a place where the temperature and humidity are normal. This helps you get the best results.
If you see a big error, check your connections and do the test again. If the error is still high, the transformer might need to be fixed or replaced.
Winding Resistance Test
Purpose
You need to check the winding resistance to find problems inside your potential transformer. This test helps you find shortened turns and bad connections. You also learn if the windings are healthy. Healthy windings help your electrical system work well. Measuring winding resistance shows if there is damage. It also helps you know how much energy is lost in the wires.
The winding resistance test helps you:
Find shortened turns and bad connections.
Learn about the health of the windings.
See if there is damage and figure out wire losses.
Procedure
DC Current Application
First, ground the transformer. Attach the ground wire to the station ground. Then, connect the test set ground. Add any tools you need, like a remote control or warning light. Make sure everything is ready before you start.
Next, connect the current and voltage leads to the test set. Do not connect them to the transformer yet. Check that all wires are tight. Loose wires can give wrong readings or be unsafe.
Now, connect the leads to the transformer. Each transformer may need a different setup. Look at your wiring diagram. Put the voltage leads inside the current leads and close to the transformer. This helps you get good results. Be careful so the leads do not fall off or touch each other.
Plug in the test set. Before you do this, check that the power source ground has a good path to the station earth ground. This step keeps you safe and helps the test work right.
Voltage Drop Measurement
After you set up the test, put a small DC through the winding. The test set will measure the voltage drop across the winding. You can use Ohm’s Law to find resistance:
Resistance (Ω) = Voltage Drop (V) / Applied Current (A)
Write down the resistance for each winding. Repeat the test for all windings so you do not miss any problems.
Tip: Always wait for the readings to settle before you write them down. This helps you avoid mistakes from temperature changes or magnetic effects.
Expected Values
Compare your measured resistance with the manufacturer’s numbers. If you see a big difference, there may be a problem. Changes in winding resistance can show faults like shorted turns, loose connections, or damaged wires. High resistance often means loose or rusty connections. This can cause overheating and failure. Broken wires also cause higher resistance because less metal carries the current.
The test is very important for tap changers. High contact resistance can mean the tap changer is not working properly. Always check for changes from the expected values. If you find a problem, fix it before you use the transformer again.
Fault Type | What Resistance Shows | Possible Effect |
|---|---|---|
Shorted Turns | Lower than normal | Less efficiency |
Loose/Corroded Connections | Higher than normal | Overheating, failure |
Broken Strands | Higher than normal | Less current flow |
Tap Changer Issues | High contact resistance | Poor operation |
Note: Regular winding resistance tests help you find problems early and keep your transformer safe.
Insulation Resistance Test
Purpose
You need to check the insulation resistance to keep your potential transformer safe. This test shows if the winding insulation is still good. Good insulation keeps leakage currents low. It also helps stop failures. Testing insulation resistance can find problems like moisture, dirt, or too much heat. These problems can make the transformer break or not work well. If you keep the insulation strong, your equipment stays safe and works well.
Procedure
Using an Insulation Tester
Follow these steps to test insulation resistance:
1. Ground the transformer tank and core to stay safe.
2. Take off all wires from the transformer. This lets you test only the insulation.
3. Use jumpers to connect high voltage and low voltage bushings.
4. Pick a megohmmeter that can read at least 20,000 MΩ.
5. Remove ground wires before you measure resistance between windings and ground.
6. Turn on the megohmmeter and keep the reading for one minute. Write down the value and the temperature during the test.
Tip: Always use clean and dry test leads. Wet or dirty leads can give wrong readings.
Monitoring Stability
Watch the megohmmeter reading. The number should stay steady for at least one minute. If the number jumps around, there may be a problem with the insulation. Write down the readings at one minute and ten minutes. This helps you check the insulation over time. If the resistance drops fast, there may be moisture or dirt inside the transformer.
Step | What to Watch For | Why It Matters |
|---|---|---|
Start Test | First resistance value | Shows insulation health |
After 1 Minute | Steady reading | Confirms good insulation |
After 10 Minutes | Compare with the first reading | Checks for moisture |
Result Analysis
Look at your results to see if the transformer is healthy. High insulation resistance means the insulation is strong. Low resistance can mean the insulation is old or damaged. You can use Ohm’s law to find the resistance. To check insulation over time, use the Polarization Index (PI) and Dielectric Absorption Ratio (DAR). PI is the ten-minute reading divided by the one-minute reading. A PI above 1.3 means the insulation is good.
High insulation resistance means strong insulation.
Low resistance can mean aging or damage.
PI and DAR help you track insulation health over time.
Compare your results with old tests. If resistance drops over time, you may need to fix or replace the transformer. Always keep records of your tests. This helps you find problems early and keep your system safe.
Note: If you find low insulation resistance, do not use the transformer until you fix the problem. This keeps your equipment and people safe.
Load Testing for Potential Transformer

Load testing shows how a potential transformer works in real life. You should know the difference between no-load and nominal load tests before you begin.
No-load Test: You check core losses and excitation current when the secondary winding is not connected. This test tells you how much energy the transformer uses to keep its core running.
Nominal Load Test: You see how the transformer works when it is powering something. You measure copper losses, voltage changes, and efficiency while the transformer gives power to a load.
No-Load Test
Start with the no-load test. This test helps you learn how much energy the transformer uses when it is not giving power to anything.
1. Get your tools ready. You need a voltmeter, ammeter, wattmeter, variable voltage source, and safety gear.
2. Turn off the transformer and make sure it is not connected. The secondary winding should be open.
3. Connect the primary winding to the variable voltage source.
4. Slowly turn up the voltage until it reaches the rated level.
5. Measure and write down the input power, voltage, and current.
6. Use your readings to figure out core losses and magnetizing current.
7. Make sure core losses and magnetizing current are not higher than the limits on the transformer’s nameplate.
Tip: Always check that the voltage and frequency are correct. Stable numbers help you get good results.
Nominal Load Test
The nominal load test shows how the transformer works when it is giving power to something. You need to watch different things to make sure the transformer is safe and works well.
Steps for Nominal Load Test:
1. Connect the transformer to a load that matches its rated size.
2. Use meters to check input and output voltage, current, and power.
3. Write down how much the temperature goes up during the test.
4. Check voltage changes by looking at the output voltage with no load and with full load.
5. Find copper losses by seeing the difference in power between the input and output.
6. Test how the transformer handles extra load by making the load bigger for a short time and watching for overheating or voltage drops.
Description | |
|---|---|
Voltage Regulation | Checks if the output voltage stays steady |
Temperature Rise | Watches for overheating problems |
Copper Losses | Measures energy lost in the windings |
Core Losses | Tracks energy lost in the transformer core |
Power Factor | Shows how well the transformer uses power |
Harmonic Distortion | Finds problems with the shape of the wave |
Power Quality | Makes sure power is clean and steady |
Performance Assessment
Look at your test results to see if the transformer is efficient and reliable. Efficiency changes when the load changes. At low loads, core losses are bigger. When the load is between 40 and 75 percent, efficiency is highest. At full load, copper losses go up. If you put too much load on the transformer, efficiency drops and it can get damaged.
Dominant Loss Type | |
|---|---|
0–25% | Core losses are the biggest |
40–75% | Losses are balanced, best efficiency |
100% | Copper losses are the biggest |
>100% | Too many losses, low efficiency |
Keep the transformer working close to its best load range. This helps you get good efficiency and keeps it from getting too hot. If you see high losses or the voltage is not steady, you should change the load or look for problems.
Note: Doing load tests often helps you find problems early and keeps your transformer safe.

Troubleshooting and Safety
Fault Identification
It is important to find faults early to keep your potential transformer safe. Many problems can happen during testing. Watch out for these common faults:
Conductive circuit and voltage regulator switch failure. This can happen from bad contact, poor welding, or rust.
Insulation failure. Old materials or water can make insulation weak.
Gas production failure. Sparks, heat, or small discharges can make gas inside the transformer.
Winding fault. Bad welding or short-circuits can hurt the windings.
Oil leakage fault. Oil might leak at seams and harm nature.
Multi-point ground fault. Bad grounding can cause too much heat or sparks.
You can use different ways to find these faults. Some tests do not need to open the transformer. These tests can find turn-to-turn faults right away. Online monitoring checks current and voltage patterns to find problems. The Extended Park’s Vector Technique looks at current waveforms to find inside faults. Frequency response analysis checks for changes inside the transformer that may show hidden problems.
Corrective Actions
After you find a fault, you must fix it fast. The table below lists some actions and how they help:
Action | Benefit |
|---|---|
Oil purification | Takes out water and gas |
Regular BDV testing | Keeps the dielectric strength strong |
Acid number monitoring | Watches for oil getting old |
Verify coolant flow | Make sure the cooling works well |
Check the arrester condition | Stops damage from too much voltage |
Periodic inspection of tap changers | Stops arcing and keeps contacts good |
Real-time monitoring of oil temperature | Gives alerts and helps with ratings |
You should also tighten loose wires, change broken parts, and clean the transformer. Always follow the maker’s repair steps. If you see oil leaks, seal them right away to stop more harm. For insulation problems, dry the transformer and change any old materials.
Tip: Write down all repairs and tests. This helps you watch your transformer’s health over time.
Safety Guidelines
Safety is always most important when you fix a potential transformer. Acting fast can stop damage and keep people safe. You help others by keeping the area around a broken transformer safe. You also help the power grid by acting quickly.
Follow these best practices:
Join training to learn both theory and hands-on skills.
Practice real-life situations during training.
Take part in safety drills and checks to follow rules.
Always wear personal protective equipment (PPE) and check it.
Talk with your team and build a safe work culture.
Keep up with new industry rules and standards.
You should also check for risks before you start work. Look for dangers like electrical faults or too much heat. Think about how likely each risk is and how bad it could be. This helps you plan safety steps and keeps your work safe.
Note: Never work alone when testing or fixing a transformer. Having a partner close by can save lives if something goes wrong.
Testing a potential transformer helps keep your electrical system safe. You should raise the voltage slowly and check the insulation resistance. Use both AC and DC tests for better results. Always wear safety gear and work with someone else. Write down every test result and what you do for maintenance. Use a logbook to track protection devices, arrestors, sampling, cooling, and bushings.
Documentation Procedure |
|---|
Record arrestor condition in maintenance records. |
Write the sampling steps in the maintenance log. |
Record how the cooling system works in the log. |
Write the bushing condition in the maintenance records. |
Record all test results in the maintenance system. |
Test your transformer when you first start it, after big problems, and at set times.
Testing Instance | Frequency/Condition Description |
|---|---|
Commissioning (Startup Phase) | Test new transformers to make sure they work right before use. |
Periodic Maintenance | |
After Significant Events | Test after overloads, short circuits, or failures to check for damage. |
Diagnostic Investigation | Test if you see something strange to find out why. |
End-of-Life Assessment | Do full tests to see how much life is left as transformers get old. |
Follow the maker’s rules for each test. Use thermography, oil checks, and gas tests to find problems early.
Testing Method | Purpose |
|---|---|
Initial Test | |
Routine Test (Long Outage) | Full check when you have lots of time and money |
Routine Test (Short Timeframe) | Quick check if you have less time or money |
Thermography | Check if the cooling system and bushings are too hot |
Dissolved Gas-in-oil (DGA) | Find signs of electrical faults |
Oil Quality Test | Find water or other problems in the oil |
If you find hard problems, ask an expert for help. Careful testing and regular checks help your transformer last longer and work better.
FAQ
What is a potential transformer used for?
You use a potential transformer to measure high voltages safely. It steps down the voltage so meters and protective devices can read it without risk.
How often should you test a potential transformer?
You should test your potential transformer once a year. You also need to test it after any major fault or before starting it for the first time.
What safety gear do you need for testing?
You need insulated gloves, safety goggles, and flame-resistant clothing. Always use insulated tools and work with a partner for extra safety.
Can you test a potential transformer while it is energized?
You should never test a potential transformer while it is energized. Always disconnect and ground the transformer before starting any test.
What does a low insulation resistance reading mean?
A low insulation resistance reading means the insulation may be damaged or wet. You should not use the transformer until you fix the problem.
Why do you perform both AC and DC tests?
You perform both AC and DC tests to check different parts of the transformer. AC tests show how it works in normal use. DC tests help you find faults inside the windings.
What should you do if you find oil leakage?
You should seal the leak right away. Clean the area and check the oil level. If the leak is large, contact a professional for help.
How do you record test results for a potential transformer?
You write all test results in a logbook or maintenance record. Include the date, type of test, readings, and any repairs you made.